
Microgreen-Sorte
Pea Microgreens
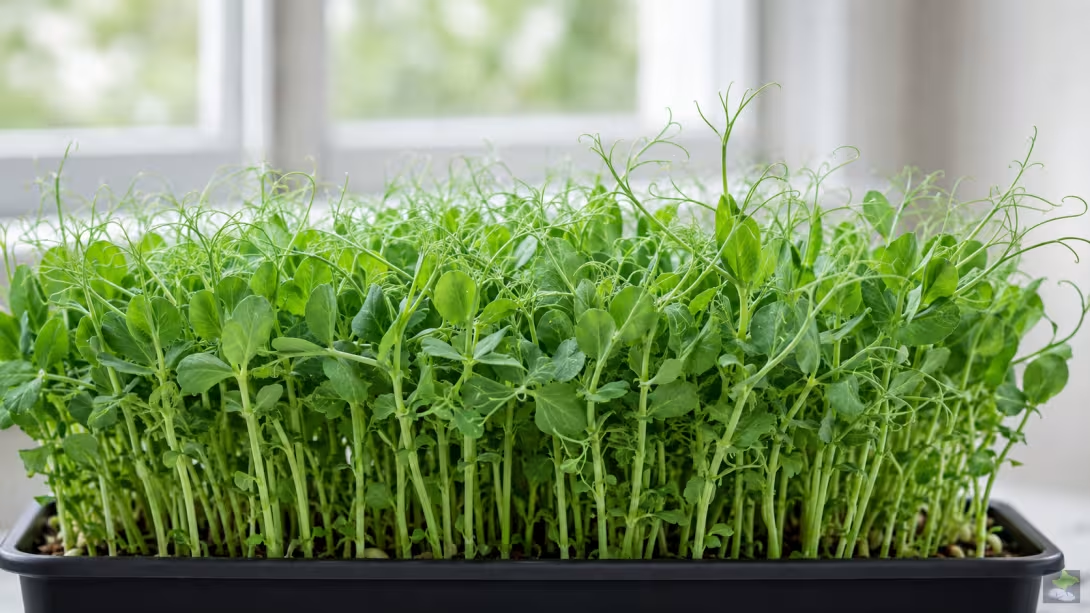
Pea microgreens combine vigorous growth, tender tendrils and a mild, sweet pea flavour. Because of their large seeds, they require especially careful moisture management, sufficient oxygen, clean workflows and documented sowing density.
Profile
- Botanical species: Pisum sativum.
- Plant family: Legumes (Fabaceae).
- Flavour: mild, fresh, slightly sweet and distinctly pea-like; dependent on cultivar and developmental stage.
- Growth: vigorous shoots with relatively large leaves; cultivar-specific tendrils develop later.
- Harvested part: young above-ground shoots, leaves and, depending on harvest timing, the first tendrils.
- Suitability: productive crop for documented trials when soaking, moisture and crop density can be managed reliably.
What Distinguishes Pea Microgreens
Pea microgreens are grown from cultivated pea seed and harvested well before flowering and pod formation. Unlike small-seeded microgreens, peas carry a large nutrient reserve in the seed. This promotes vigorous emergence but, with excessive water, also increases the risk of oxygen deficiency, rot and uneven crops.
The term pea includes numerous cultivars and types of use. Seed size, coat characteristics, germination capacity, height, tendril formation and flavour may differ. Supplier information must therefore relate to the specific cultivar and lot and be verified in your own growing trial.
Distinguish Pea Microgreens, Pea Shoots and Sprouts
Young pea crops are sold as microgreens or pea shoots. The developmental and harvest stage is decisive: microgreens are grown above a suitable medium under light and cut above the surface. Shoots cultivated for longer may already have clearly developed leaves and tendrils.
Sprouts, by contrast, generally grow in a very humid system and are eaten with the root. The FDA distinguishes microgreens from sprouts by cultivation and harvest, while noting that microgreens are not automatically risk-free. Seeds, water, hands, trays and tools can transmit microorganisms.
Select Suitable Seed
Use viable, true-to-type seed expressly suitable for food or microgreen production. Chemically treated, pelleted or otherwise unsuitably treated seed does not belong in an edible crop. Food peas of unknown storage history are not an equivalent substitute for traceably labelled seed.
Record species, cultivar, supplier, lot number, purchase date and storage conditions. Keep seed dry, cool and protected from pests until use. Do not mix lots without testing because seed size, water uptake and germination rate may vary considerably.
Test Germination Before Sowing a Full Tray
A germination test with a counted quantity of seed shows whether a lot is suitable for a larger cycle. Count normally developed seedlings and record damaged, rotting or greatly delayed seeds separately. For peas, also document unusual odours, split seed coats and soft areas.
Low germination cannot be offset by especially dense sowing. Large ungerminated seeds retain moisture in the crop, create gaps and may affect neighbouring plants.
Assess Soaking Under Controlled Conditions
Pea seeds increase greatly in volume while soaking. Controlled soaking can make water uptake more uniform, but it is not universally necessary for every cultivar and system. Determine duration, water temperature, seed quantity and the ratio of water to seed from supplier guidance and small preliminary trials.
Soaking for too long or too warmly can promote oxygen deficiency, softened seed coats and microbial growth. The soaking vessel must be clean and sufficiently large. Drain excess water completely afterwards; the seeds must not remain in standing residual water for prolonged periods.
Document a Soaking Trial
- Record dry seed mass and lot.
- Use a clean vessel and suitable water.
- Document start, end and water temperature.
- Drain soaked seeds and conduct a sensory check.
- Discard soft, discoloured seeds or those with an unusual odour.
- Compare the result with an unsoaked control sample.
Prepare Trays and Substrate
Stable, food-safe trays with drainage holes facilitate controlled cultivation. A solid lower tray later enables bottom watering. Because large soaked seeds are heavy, trays must retain their shape and stand level.
Structurally stable propagation substrates or mats intended for food crops are suitable if they retain water while allowing air to reach the roots. Moisten the medium evenly without saturating it. Compacted, poorly aerated material or permanent standing water are particularly problematic for peas.
Prepare the Growing Area
Clean shelves, work surfaces, trays and tools before each cycle. Pets, open waste, soil from houseplants and unwashed harvest containers do not belong in the immediate production area. Condensation must not drip from lights or shelving onto the crop.
Determine Sowing Density Systematically
Because of their seed size, peas require considerably more space than small-seeded species. Distribute them as evenly as possible in one layer without large clusters or seeds permanently stacked on one another. Sowing too sparsely uses space poorly; an overcrowded crop remains moist for longer and is less well ventilated.
General seed-density calculators provide a starting point but do not replace cultivar- and lot-specific trials. The usable tray area, thousand-seed weight, increase during soaking, germination capacity, medium and desired harvest stage are decisive. Record the seed mass actually used for every cycle.
Sow Repeatably
- Record the inside dimensions and area actually occupied.
- Fill the medium evenly and moisten it uniformly.
- Weigh a defined quantity of dry or soaked seed.
- Distribute seeds evenly and avoid multiple layers.
- Label the tray with cultivar, lot, sowing date and pretreatment.
- Change only one important variable in the next cycle.
Control the Germination Phase
Keep the seedbed evenly moist during germination but never permanently saturated. A clean second tray can distribute moisture and gentle pressure, but must not seal the crop airtight. Large seeds and dense substrate require sufficient gas exchange.
Inspect the crop at least daily. Remove the cover when shoots lift it and develop uniformly. Unusually sour or putrid odours, slimy areas, soft seeds and dark discolouration are warning signs, not a normal part of germination.
Observe Development Rather Than the Calendar
Rigid germination times are less reliable than visible development and sensory condition. Cultivar, seed age, seed size, soaking method, temperature and water availability alter the process. Uniform emergence, firm stems and an unremarkable odour are decisive.
Light and Crop Development
After germination, pea microgreens need uniform light. Insufficient light produces long, soft, pale shoots. Excessive intensity, trapped heat or inadequate lamp distance, by contrast, can cause leaf stress and uneven drying.
A stable day–night rhythm and repeatable distances are more important in comparison trials than a blanket maximum amount of light. Record plant height, leaf colour, tendril formation and leaning towards the light. Change duration or intensity individually.
Assess Tendrils and Stability
As they develop, many pea cultivars form tendrils that connect neighbouring shoots. This can stabilise the crop, but makes uniform harvesting more difficult in a very dense crop. Long, thin and strongly leaning shoots are more indicative of insufficient light or an excessively long dark phase.
Irrigation and Air Movement
Keep the root environment moist but not permanently wet. After early germination, bottom watering can keep leaf surfaces drier. Excess water must not remain in the lower tray for long. Inspect large, still-visible seeds specifically for soft or unusual areas.
Gentle air movement supports moisture removal between the vigorous shoots. Strong direct airflow dries edge areas and can stress plants mechanically. The goal is an even microclimate without wet pockets, condensation or dry zones.
Document Irrigation
Record water volume, time, water temperature and visible moisture status. This helps distinguish whether a problem arises from seed, soaking, substrate, irrigation or indoor climate. Water must be suitable for the intended food crop; do not reuse residual water without assessment.
Choose Harvest Time by Developmental Stage
Harvest pea microgreens when the crop is uniformly developed, sufficiently stable and without sensory abnormalities. The desired stage can range from young leaves to clearly visible tendrils. Cultivar, intended use and desired tenderness determine the harvest window.
A later harvest changes stem firmness, fibre content, tendril formation, flavour and shelf life. Do not harvest solely according to calendar days. Photograph the specific developmental stage and document it with sowing date, conditions and harvest weight.
Harvest Cleanly
- Harvest only dry crops or crops whose surfaces have dried well.
- Clean hands, knife or scissors and harvest containers.
- Cut shoots well above the growing medium.
- Remove substrate, seed coats and damaged plant parts.
- Use the harvested produce promptly or cool it under controlled conditions.
Hygiene and Food Safety
Pea microgreens are often eaten raw or only briefly heated. Clean workflows are therefore part of the entire growing process. Contamination can enter through seed or water and then spread via hands, tools, trays and surfaces.
- Use only suitable, traceably labelled seed.
- Keep soaking vessels, trays, tools and harvest containers clean.
- Protect irrigation water and lines against backflow and contamination.
- Discard entire crops that are slimy, smell rotten or are discoloured.
- Separate the harvest and unwashed production equipment in space or time.
Distinguish Root Hairs from Mould
Fine root hairs occur regularly on young roots and may look like white fluff after humid periods. Irregular webbing on seed, stems or substrate, unpleasant odours, discolouration and soft tissue, by contrast, indicate a problem. Do not eat uncertain crops.
Flavour and Use
Pea microgreens add a mild, fresh pea flavour to salads, sandwiches, bowls, soups and hot dishes. Tender tips and young tendrils are suitable as a garnish. Adding them shortly before serving preserves colour and texture more effectively.
With increasing development, stems may become firmer and leaves stronger. Conduct a small sensory test before a larger harvest. Do not mask bitter, musty or unusually sour portions with seasoning; discard them and investigate the growing conditions.
Put Nutrients into Perspective
Peas and young pea shoots can contain protein, vitamins, minerals and various phytochemicals. Measured concentrations nevertheless depend on genetics, seed reserves, growing medium, light, water, developmental stage, harvest and analytical method.
An individual laboratory value cannot therefore be applied indiscriminately to every home-grown tray. Pea microgreens can complement a varied diet but replace neither balanced food choices nor medical treatment. “Superfood” is not a reliable scientific quality category.
Maintain Freshness After Harvest
After harvesting, respiration, moisture loss and microbial processes continue to change the produce. Clean harvesting, prompt use and controlled cooling are therefore more important than blanket shelf-life promises. Do not seal wet produce tightly before surface moisture has been removed under controlled conditions.
Common Problems
Soft or rotting seeds
Common causes include excessively long soaking, warm standing water, damaged seeds, overly wet substrate or insufficient oxygen. Do not rescue affected crops or mix them with healthy lots; discard them completely.
Uneven germination
Possible causes include weak seed lots, different seed sizes, uneven soaking and dry or saturated areas. First check germination and pretreatment, then moisture distribution and seed position.
Long, unstable shoots
Insufficient light, an excessively long dark phase, high temperature or overcrowded sowing can promote soft shoots. Do not change every factor simultaneously. A documented comparison shows which correction actually works.
Matted tendrils and uneven harvest
At a later harvest, tendrils connect neighbouring shoots. More uniform sowing density and an earlier defined harvest criterion make cutting easier. Do not pull heavily tangled crops apart roughly if this introduces substrate into the harvest.
A Documented Initial Trial
A few identical trays are sufficient to begin. Use the same seed lot, growing medium and clearly defined seed mass. Compare no more than one pretreatment or sowing density while keeping lamp distance, irrigation method and harvest criterion constant.
- Cultivar, supplier and lot number
- Tray size and usable area
- Dry seed mass, germination rate and soaking method
- Sowing, lighting and harvest dates
- Irrigation volumes and visible moisture status
- Plant height, tendril formation, unusual observations and harvest weight
Only when several cycles work repeatably under similar conditions should sowing density or production area be increased. This turns a single tray into a reliable process rather than a chance snapshot.
Conclusion
Pea microgreens are a vigorous, mildly flavoured crop with particular requirements for soaking, oxygen supply and moisture control. Suitable seed, even distribution, structurally stable substrate, appropriate light, gentle air movement and consistent hygiene provide the foundation.
Starting small, documenting pretreatment and measurements and changing only one important variable per cycle allows the crop to be adapted to the cultivar, room and production objective—without blanket promises about soaking time, seed quantity or harvest date.