
Microgreen-Sorte
Cress Microgreens
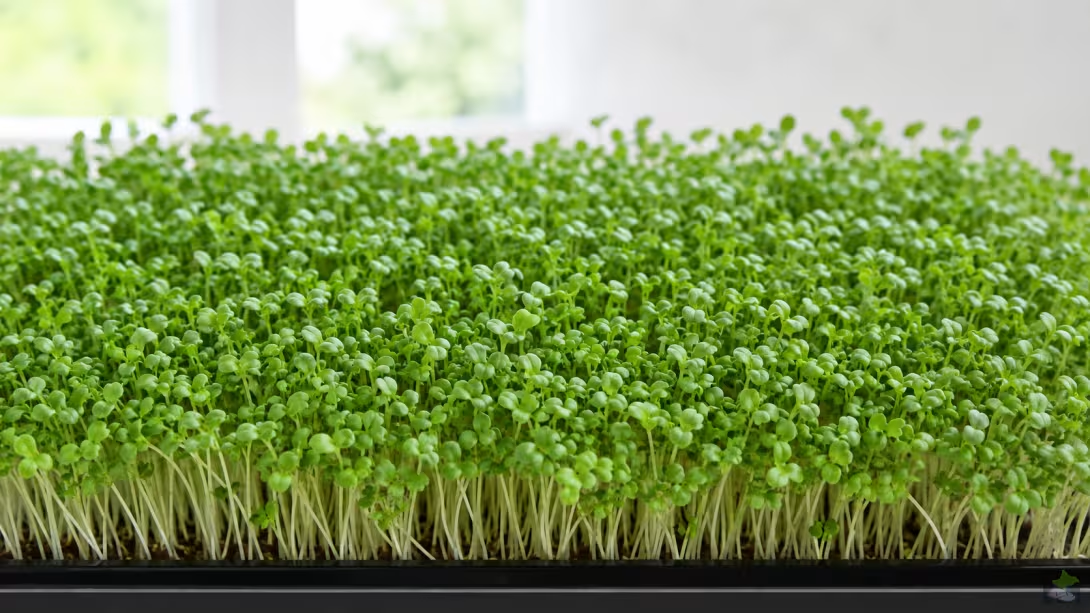
Cress Microgreens at a Glance: Garden cress grows rapidly, producing slender pale stems and small green cotyledons. High-quality seed, documented sowing density, balanced moisture, sufficient light and clean workflows are crucial for uniform crops produced under controlled hygiene.
Profile
- Botanical species: Lepidium sativum
- Plant family: Brassicas (Brassicaceae)
- Flavour: fresh and spicy and, depending on the cultivar, distinctly hot
- Growth: slender, low and very uniform under suitable conditions
- Harvested part: seedling stems and above-ground leaves
- Suitability: fast-responding crop for small, documented growing trials
What Distinguishes Cress Microgreens
Garden cress is one of the best-known edible young plants. As a microgreen, it is grown in a suitable substrate or on a mat intended for food crops and harvested above the surface. The crop consists of many slender stems with small cotyledons; the first true leaves may become visible if cultivation continues longer.
The term “cress” is not always used unambiguously in commerce. For repeatable cultivation, the botanical species, cultivar, supplier and lot must therefore be documented. Garden cress must not be equated without verification with watercress, nasturtium or other plants. Some belong to different genera, have different growing requirements and may taste different.
The characteristic flavour does not arise from one universally measurable property. Cultivar, developmental stage, temperature, light, water supply and harvest timing affect heat, tenderness, colour and yield. A seed supplier’s claims should therefore be supplemented by your own germination and cultivation test.
Distinguish Cress Microgreens from Cress Sprouts
Sprouts and microgreens are different products. Sprouts are usually produced without a growing substrate in a very humid system and often eaten with the root. Microgreens grow on or in a suitable medium, receive light and are cut above the substrate surface.
The FDA distinguishes the two categories using features including developmental stage and harvesting method. This distinction is also relevant to workflows and hygiene. A product does not become a microgreen merely because the seed is densely sown or the crop is harvested young.
Garden cress develops rapidly, which can tempt growers to treat it like sprouts. A controlled microgreen crop nevertheless requires a clean growing medium, light, air exchange and harvesting above the surface.
Select Suitable Seed
Use viable, true-to-type seed expressly suitable for food or microgreen production. Chemically treated, pelleted or otherwise unsuitably treated seed does not belong in an edible young-plant crop. Penn State Extension recommends high-quality, untreated and uncoated seed with good germination capacity.
Record species, cultivar, supplier, lot number, purchase date and storage conditions. Store seed dry, cool and protected from moisture. Do not mix lots without testing because germination rate, seed size and development may differ.
Test Germination Before Sowing a Full Tray
A germination test using a counted quantity of seed shows whether a lot is suitable for a larger cycle. Place the seeds on clean, moist paper and keep them under suitable conditions. Count normally developed seedlings and record damaged, weak or markedly delayed seedlings separately.
Low or greatly delayed germination cannot reliably be offset by especially dense sowing. This is more likely to cause gaps, different developmental stages and moisture zones that are difficult to control. Do not use the lot for food production if it has an unusual odour, visible discolouration or slimy material.
Prepare Trays and Growing Medium
Shallow, food-safe trays with drainage holes facilitate controlled cultivation. A solid lower tray later enables bottom watering. All containers must be stable, undamaged and easy to clean. Wood, absorbent construction materials and containers with inaccessible areas make hygiene more difficult.
Fine propagation substrates or mats intended for food crops are suitable if they absorb water evenly while allowing air to reach the roots. Fill the material evenly and moisten it uniformly without saturating it. Material already densely rooted is difficult to clean reliably and should not be reused uncritically.
Clean the growing area before each cycle. Soil from houseplants, pets, splashing water, open waste and unwashed harvest containers do not belong in the immediate production area. Arrange lights and shelving so that condensation cannot drip onto the crop.
Determine Sowing Density Systematically
Distribute cress seed as evenly as possible without large clusters or bare areas. Sowing too sparsely uses the area poorly; an overcrowded crop dries more slowly, competes more strongly for light and may form moist, poorly ventilated areas.
General seed-density calculators can provide a starting point but do not replace a species-specific trial. The usable tray area, thousand-seed weight, germination capacity, cultivar, growing medium and desired harvest stage are decisive. Record the seed mass used for every lot and adjust it gradually.
Sow Repeatably
- Record the inside dimensions and area actually occupied.
- Fill the growing medium evenly and moisten it uniformly.
- Weigh a defined quantity of seed.
- Distribute the seed uniformly and gently break up clusters.
- Label the tray with cultivar, lot and sowing date.
- Change only one important variable in the next cycle.
Control the Germination Phase
Keep the seedbed uniformly moist during germination but not permanently waterlogged. A clean cover or second tray can briefly help balance moisture and contact with the growing medium. The crop must nevertheless be checked regularly.
Remove the cover and provide light as soon as the seedlings rise clearly. Staying beneath a closed cover for too long promotes pale, unstable stems and can intensify moist zones. Cress responds rapidly, so inspections must follow development rather than a rigid calendar alone.
Seed coats on the leaves are not automatically a sign of disease. If they occur together with poor germination, unusual odours or uneven wet areas, however, check seed quality, moisture management and sowing density.
Light and Crop Development
After germination, cress microgreens require uniform light. Insufficient light produces long, thin, unstable stems. Very high intensity or insufficient lamp distance, by contrast, can cause heat load, premature drying and leaf damage.
Repeatable conditions matter more than a blanket lighting duration. Record lamp type, distance, lighting time and measured temperature. Rotate trays only if the lighting is visibly one-sided; even illumination from the outset is preferable.
A bright window may suffice with a suitable orientation and season, but produces more variable conditions. A suitable grow light is generally easier to control for comparative trials. A dark period remains appropriate even under artificial lighting.
Coordinate Irrigation and Air Movement
Keep the root environment moist without permanent free water in the crop. Once plants are adequately rooted, bottom watering can keep leaf surfaces drier. Do not leave excess water in the lower tray for prolonged periods.
Irrigation frequency depends on the tray, medium, crop density, temperature, humidity and air movement. A rigid schedule without visual and weight checks is unreliable. Weighing the tray before and after watering can help assess water use between comparable cycles.
Gentle air movement supports moisture removal. Strong direct airflow dries edge areas and can flatten the slender cress stems. Fans must also not carry dust or dirt from unclean areas onto the crop.
Choose Harvest Time According to the Crop
Harvest cress when the crop reaches the desired colour, strength and leaf development. Assess the actual developmental stage rather than only a fixed number of days. Cultivar, temperature, light and sowing density can shift development considerably.
Harvesting too early may mean low mass and delicate plants. With later harvesting, texture, flavour and appearance change and care requirements increase. Record sowing date, start of the light phase, harvest date, fresh weight and quality observations for every cycle.
Harvest Cleanly
- Harvest only an unremarkable, dry and healthy-looking crop.
- Clean hands, work surface, knife or scissors and harvest containers.
- Cut above the growing medium and avoid contact with substrate.
- Remove damaged, discoloured or dirty plant parts.
- Use harvested produce promptly or cool it under controlled conditions.
Hygiene and Food Safety
Microgreens are often eaten raw. Clean workflows are therefore part of production, not an optional extra. Seeds, water, hands, tools, trays, growing media and surfaces can transmit microorganisms. Visually clean plants are not automatically microbiologically safe.
USDA-ARS studies show that contaminated irrigation water and seed can introduce pathogens into microgreen systems. Water of suitable microbiological quality must therefore be used. Do not attempt to “rescue” unusual crops by washing, heavier seasoning or later mixing them with unaffected produce.
Cleaning removes soil and organic residues; subsequent suitable disinfection can reduce microorganisms on intended surfaces. Follow manufacturer instructions for concentration, contact time, temperature and rinsing. Cleaning agents and disinfectants must not reach edible plants in an uncontrolled manner.
Distinguish Root Hairs from Problematic Growth
Fine root hairs can look like uniform white fluff. They occur on the roots and often become less conspicuous after moistening. Irregular webbing on seed, stems or growing medium, unpleasant odours, discolouration and soft tissue, by contrast, indicate a problem.
When in doubt, do not eat the crop. Rather than merely removing visible areas, inspect the cause and process: seed lot, cleaning, sowing density, air movement, irrigation, temperature and duration under cover.
Flavour and Use
Cress microgreens provide a fresh, spicy to hot note. They can be used raw on bread, with quark, potatoes, salads, soups and egg dishes. Cut the delicate tissue as shortly before serving as possible and add it to hot dishes after cooking.
Check odour, colour and texture before use. Do not store wet or damaged produce for long. If the crop is to be washed, use water of suitable quality and then gently remove excess surface moisture.
Its aromatic heat makes cress a seasoning component, not automatically a complete replacement for vegetables, herbs or a balanced diet. Small quantities make it easier to assess flavour and individual tolerance.
Put Nutrients into Perspective
Garden cress contains various plant constituents. Their concentration may vary with cultivar, developmental stage, light, temperature, growing medium, water supply, harvest and analytical method. Individual study values therefore cannot be transferred unchanged to every home-grown tray.
Terms such as “superfood”, “detoxification” or blanket healing effects are not reliable production characteristics. Cress microgreens can add flavour to a varied diet but replace neither balanced food choices nor medical advice.
For assessing your own crop, verifiable measures are initially more useful: germination rate, uniformity, fresh weight, rejects, water use, harvest stage and sensory quality. Health claims, by contrast, require appropriate scientific studies and must not be inferred from a strong flavour.
Recognise Common Problems
Uneven germination
Possible causes include weak seed, uneven distribution, dry or waterlogged zones and uneven contact with the medium. First check the germination test, tray level and moisture distribution. More seed is not a reliable repair.
Long, unstable stems
Often light or timely exposure is lacking. High temperatures and an overcrowded crop can reinforce the effect. Assess lamp distance, start of lighting, crop density and temperature together.
Wet, poorly ventilated areas
These often arise from excessive irrigation, compacted medium, inadequate drainage or overcrowded sowing. Correct water management and air exchange. Stronger ventilation alone does not establish that an already unusual crop is safe.
Yellowish or pale plants
Immediately after dark germination, seedlings may initially be pale and turn green under suitable light. If the crop remains pale, check light, temperature, root condition and water management. Routine fertilisation without a diagnosis can cause further problems.
Collapsed or matted crops
Forceful overhead watering, condensation, inadequate air exchange or weak stems can flatten plants. Once roots are secure, gentle bottom watering is often easier to control. Inspect damaged crops especially critically for odour and tissue condition.
A Documented Initial Trial
A few identical trays are sufficient to begin. All receive the same seed lot, growing medium and comparable environmental conditions. Change only one important variable between two cycles, such as sowing density, irrigation volume or lamp distance.
- Select a seed lot and conduct a germination test.
- Document tray area, medium and seed mass.
- Check germination daily for moisture, odour and uniformity.
- Record the start of lighting, lamp distance and temperature.
- Record irrigation volumes and visible dry or wet zones.
- Assess harvest stage, fresh weight, rejects and flavour.
- Change only one variable in the next cycle.
Such a trial does not provide a universal recipe, but it does yield reliable values for your cultivar, lot, tray and environment. Expand production area significantly only when several cycles work repeatably under similar conditions.
Conclusion
Cress microgreens combine short, readily observable development with delicate growth and a strong flavour. Successful cultivation depends not on the densest possible sowing but on suitable seed, even moisture, timely lighting, gentle air movement and consistent hygiene.
Starting small, recording measurements and not masking problems with blanket corrections allows a repeatable workflow to be developed from a few trays. The decisive standard remains a clean, uniform crop with no sensory abnormalities.
Further Technical Sources
- Penn State Extension: The ABCs of Microgreens
- Penn State Extension: Microgreens Seed Density Calculator
- USDA Agricultural Research Service: Irrigation Water and Microbial Safety of Microgreens
- USDA Agricultural Research Service: Seed, Water and Growing Media as Contamination Sources
- FDA: Guidance on Sprouts and the Distinction from Microgreens